Open WEBUI and Ollama
Private GPT was the core of what sparked my interest in Applied AI. There were two things that ran in my mind when I first got my hands on ChatGPT- How does it work internally? (which led to me exploring Neural Nets) and How can I make one for myself? (which led me to Private GPT).
The first open source tool at the time (and a top one) was Private GPT itself which is now renamed and primarily commercialized to Zylon AI. I even had a one-on-one call with the founder Ivan and was honestly mindblown with the kind of tech he had created. Although that UI was not something I sought after so I started looking for other options. And that's when I came across Open WEBUI, Still at its very early stage but yet very impressive to look at.
So I went in, got my hands dirty and got that set up. Took me a couple of weeks and then I had it all custom ready and deployed for my company's internal use. There was so much that went into it so I wanted to blog everything that I had learnt, including the mistakes and challenges faced.
Installation and Setup
Ollama
The heart of it all. HuggingFace was and still is amazing to get hold of models, but if Ollama provides it, I am not gonna hesitate to choose. Back then it only supported for MacOS and Linux (Windows beta came in much later), so I had to install it via WSL. Boy didn't it feel amazing. I later got access to an Ubuntu Machine with GPU and it felt like I was flying!
Anyway, now it's a lot more advanced, improved and has its own UI too! (It's beautiful and minimal, but I still stuck with Open WEBUI as it has a lot more functionality). So first step is to install Ollama whichever OS you are in and pull a model via ollama pull (the docs will say ollama run but that's when you want to interact via Terminal, but we will be setting up a UI after this anyway).
My current favourite is llama3.2:3b as it's just perfect in terms of its size and performance. My other favourites which I am currently using are gemma3:4b, deepseek-r1-8b and gpt-oss:20b. As of now, I prefer to use models which are less than 10GB in size (Note: I mentioned size, so the parameter limit is around <8b). gpt-oss:20b is very computationally intensive but sometimes I find its outputs too good so I take that risk occasionally.
Also, It's a given that you need to have NVIDIA GPU(s) which supports CUDA. You can still do all this if you have a good CPU memory, but let's face it, AI is a lot more fun to work with when you have a good GPU (It's a pain otherwise haha).
Okay so, Ollama is up and running with your model - you can also check on your browser localhost:11434 to check if it's running. If it's not, just run ollama serve on your terminal.
Awesome, so now we've got the Heart of our system in place!
Open WEBUI
Now we work on the main part. Before we go ahead, make sure you star their repo because it is just awesome.
I am not going to type out all the pre-requisite steps of setting up the codebase locally as their documentation covers that perfectly and I have never faced any issues while following them every time I tried to set up a new environment. So go ahead and follow everything that's in the Local Development Guide.
But here's a core checklist I've made based on what people usually miss:
- You have to be in a Linux Environment (WSL included) or MacOS of course as that's a recommended environment for running the backend.
- Have miniconda installed.
venvworks just fine too, but I've foundcondato be a lot more maintainable for this project. - Python and Node.js need to be installed.
- Make sure you do the package installations in the right directory as instructed.
- Finally, there is a good chance port
8080where the backend is made to run by default is already used. You can either find that service which is running it and disable it. Or the easier step,Ctrl+Shift+Fon VS Code (this IDE is goated btw, you can't change my mind), search for 8080 and replace it with another port number of your choice which is not used.
Awesome, once all that is done, you will be asked to make an Admin credential. Do that and make sure you save it as it is super important. Use that for making a community account too (super useful place to find additional models and tools).
Awesome, so if everything is done right, Ollama would have also been recognised by default and you will see your model being listed in the UI. Go ahead and try it out. You have officially set up your very own Private GPT!
Useful features (Advanced Setups)
Okay so you have set up our Private GPT (Yay). That's the easy part so let's get into the cool part. Now, there are a lot of capabilities we can unlock from here, to truly build an intelligent system which is useful for us and that is what I will be covering here. Everything which I have tried and which ACTUALLY worked.
I. oAuth Setup
This used to be slightly tricky during the earlier versions (especially the redirection after authentication) of Open WEBUI but has improved now. I've only worked on Microsoft Authentication so that is what I will include here.
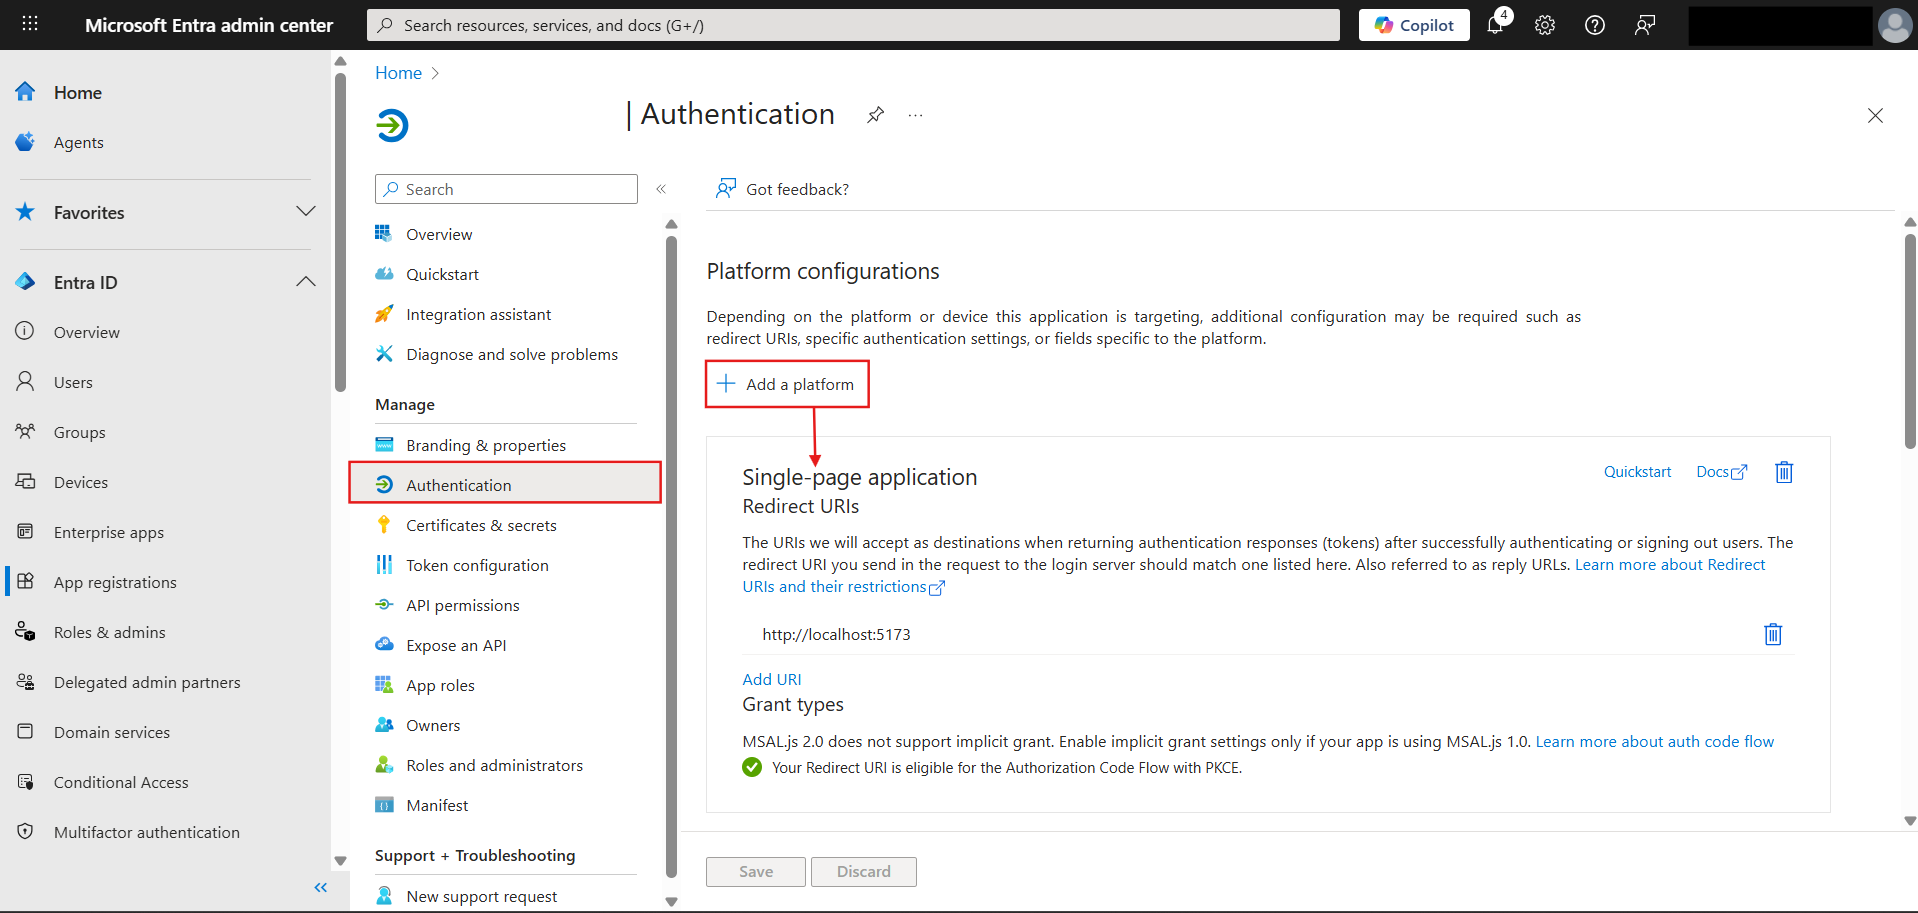
The Env Configuration of the documentation covers this really well including all the variables you require. Make sure you follow the Microsoft Learn link where they guide you through making the app on Entra. I have attached how that app is going to look after all of it is done:
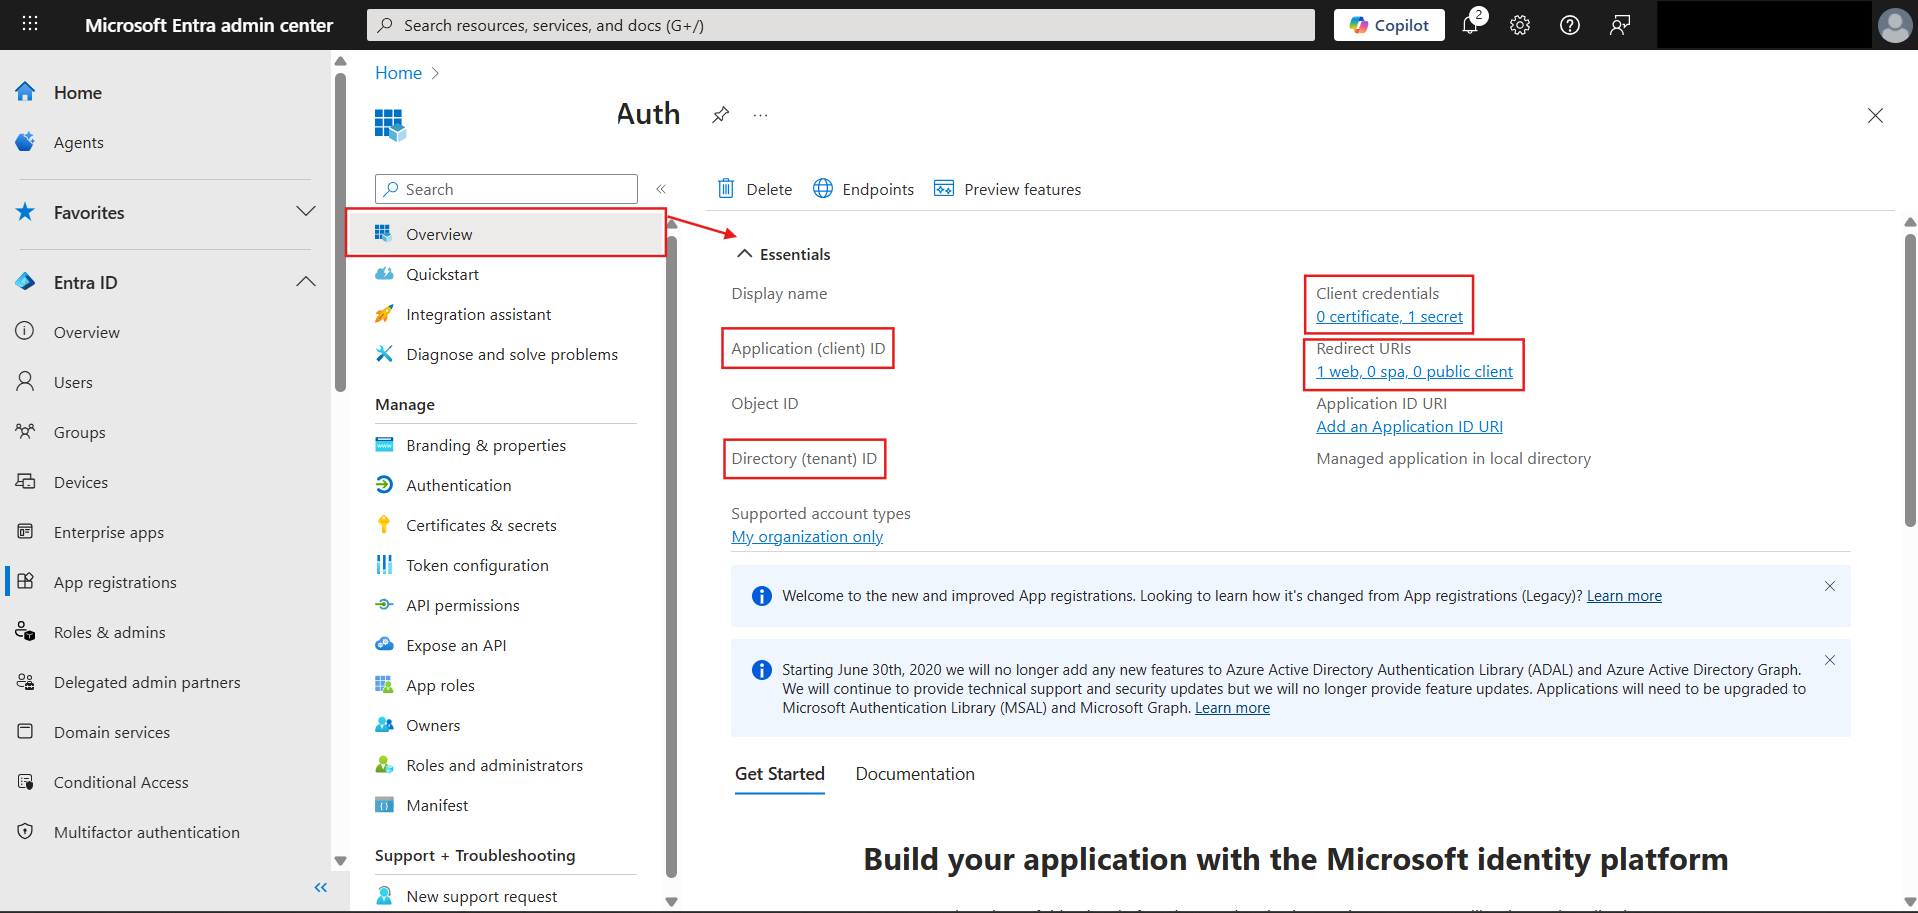
Couple of important points here:
-
While making the Client secret - take the Value, not Secret ID.
-
For redirect URL - choose WEB as your platform and for the URL, it's the backend port (8080 by default, if you have changed it as mentioned earlier add that) not the frontend WebUI URL port (not 5173). This is only when you are testing locally, while deploying just add the domain name).
-
Extension to the above point, if you have set the WebUI URL via the application settings in UI, then leave the
WEBUI_URLin config as blank. -
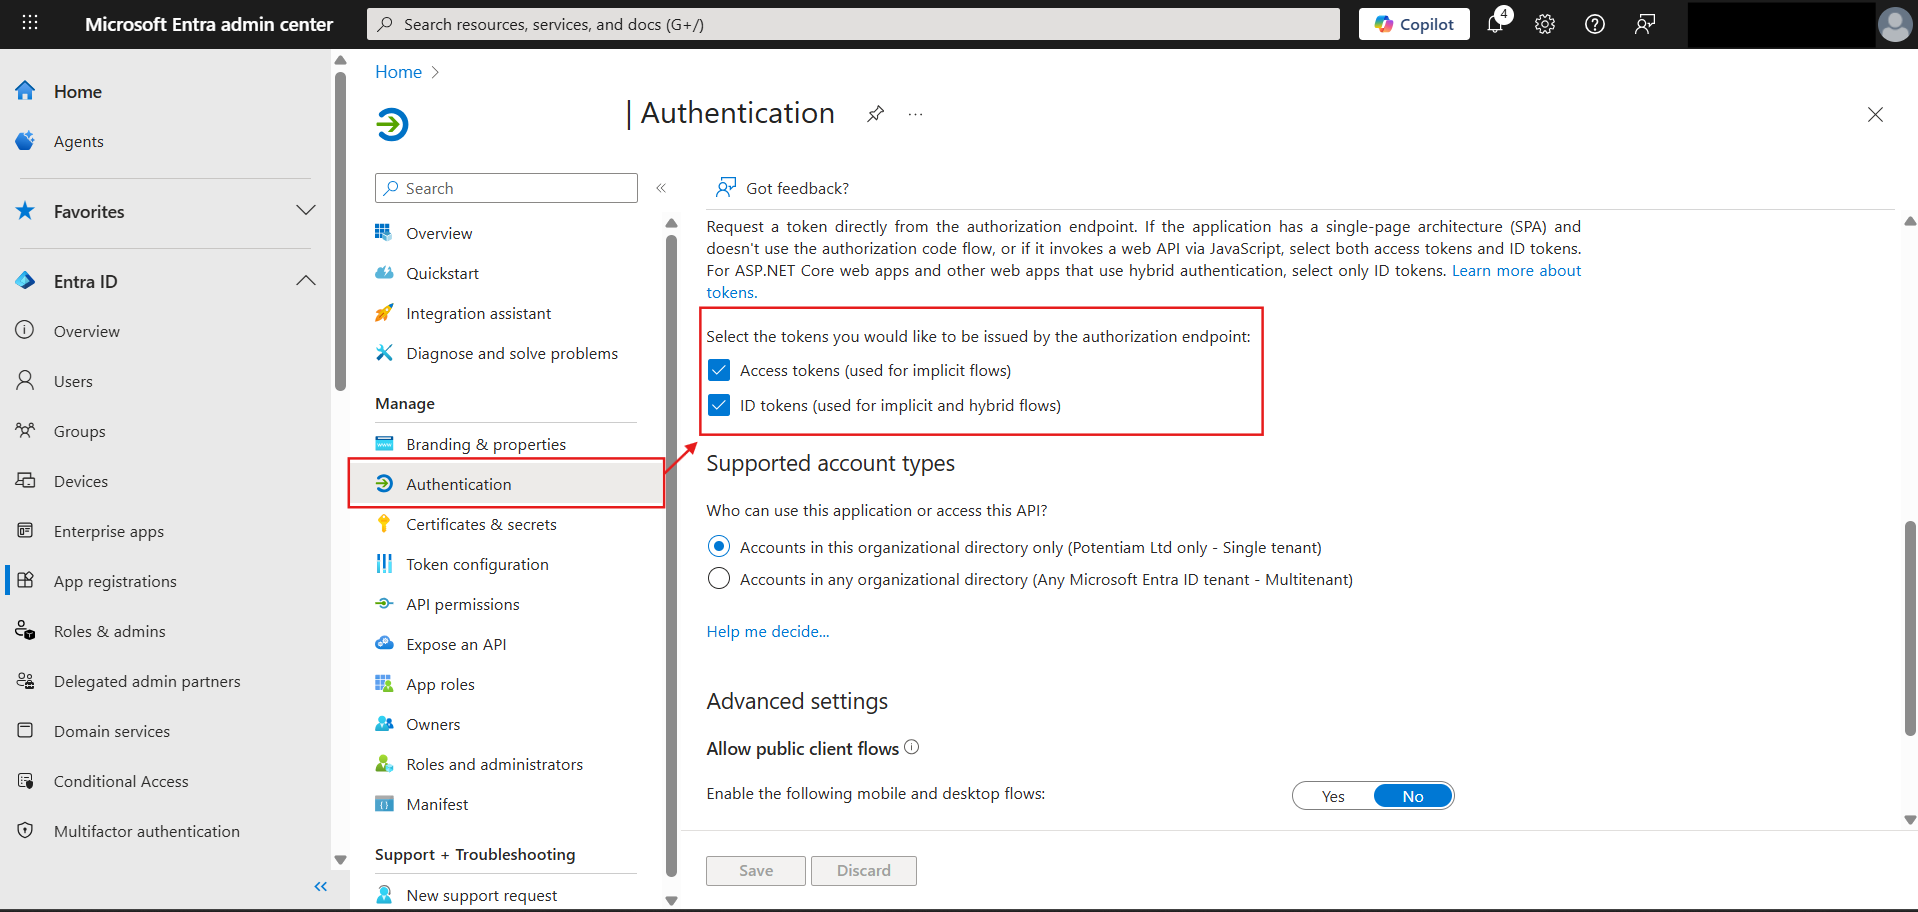
Couple of other configs to be set as True -
ENABLE_OAUTH_SETUPandOAUTH_MERGE_ACCOUNTS_BY_EMAIL. The latter is important as if not done, after successful oAuth setup it will say that an account already exists with that email.
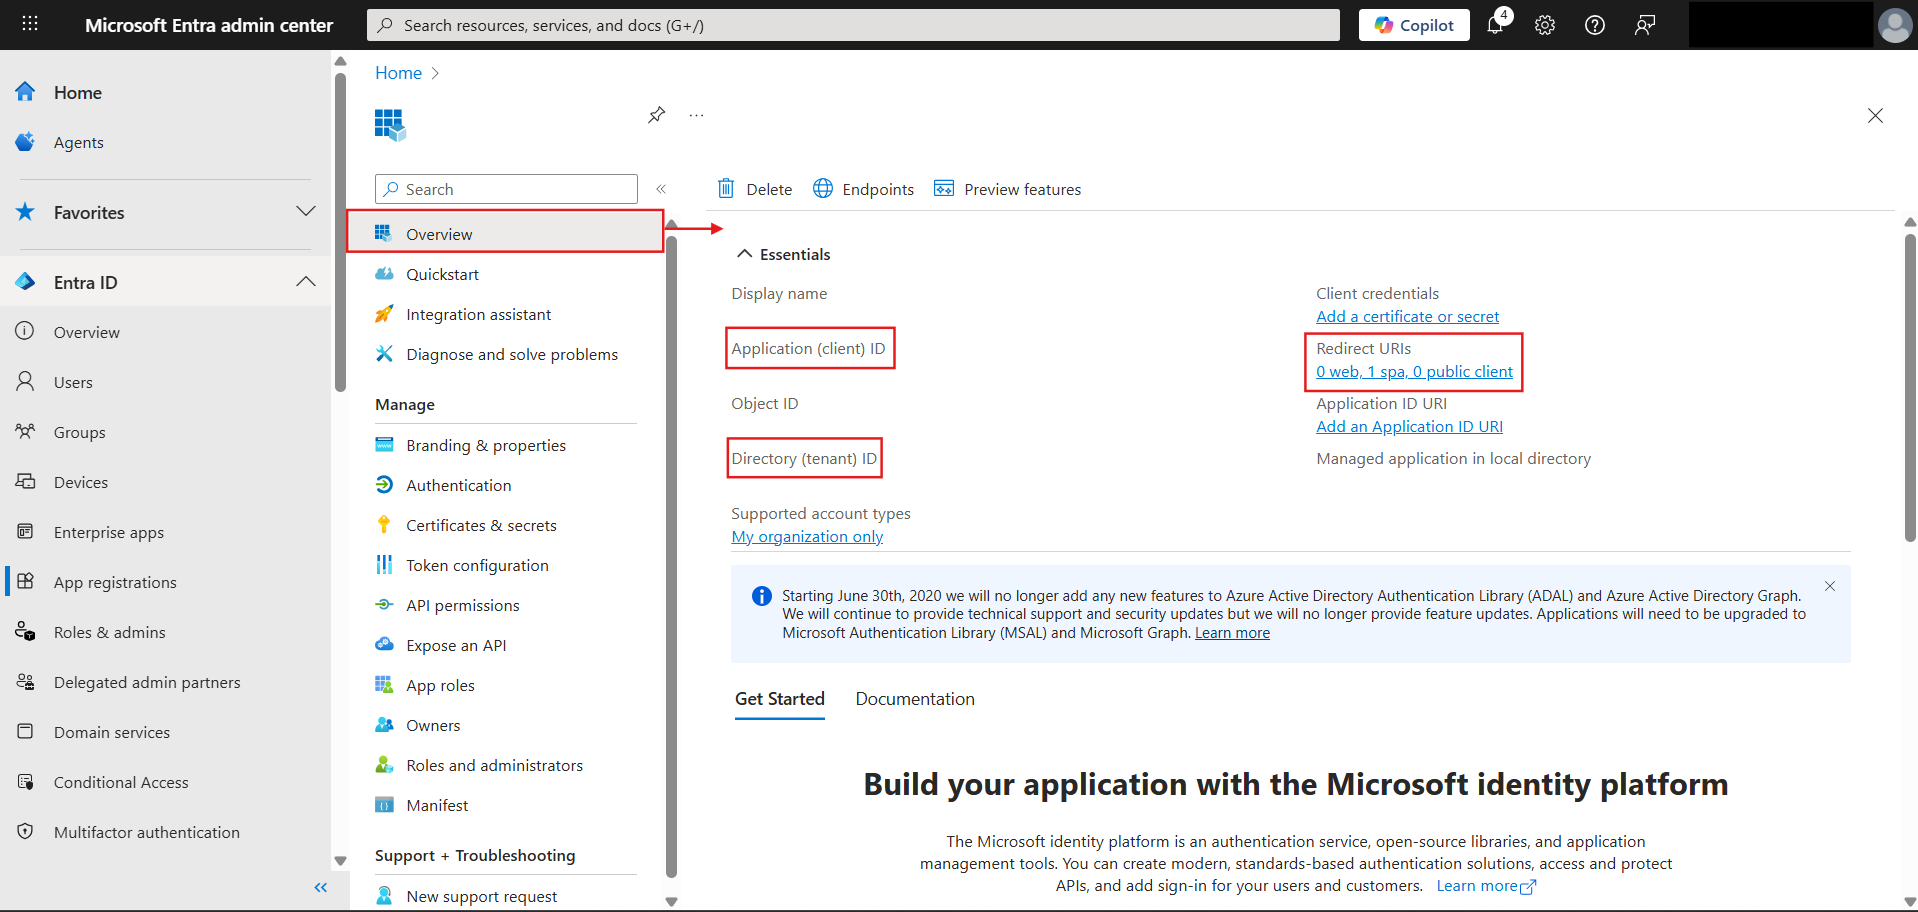
II. OneDrive Connection
This was a major challenge when the feature first came out (especially when ChatGPT enabled it as well), but there have been significant improvements during the Open WEBUI versions 0.6.30 to 0.6.32. You can have a look at the thread we had on this as I tried to resolve this with the community on the official Discord channel.
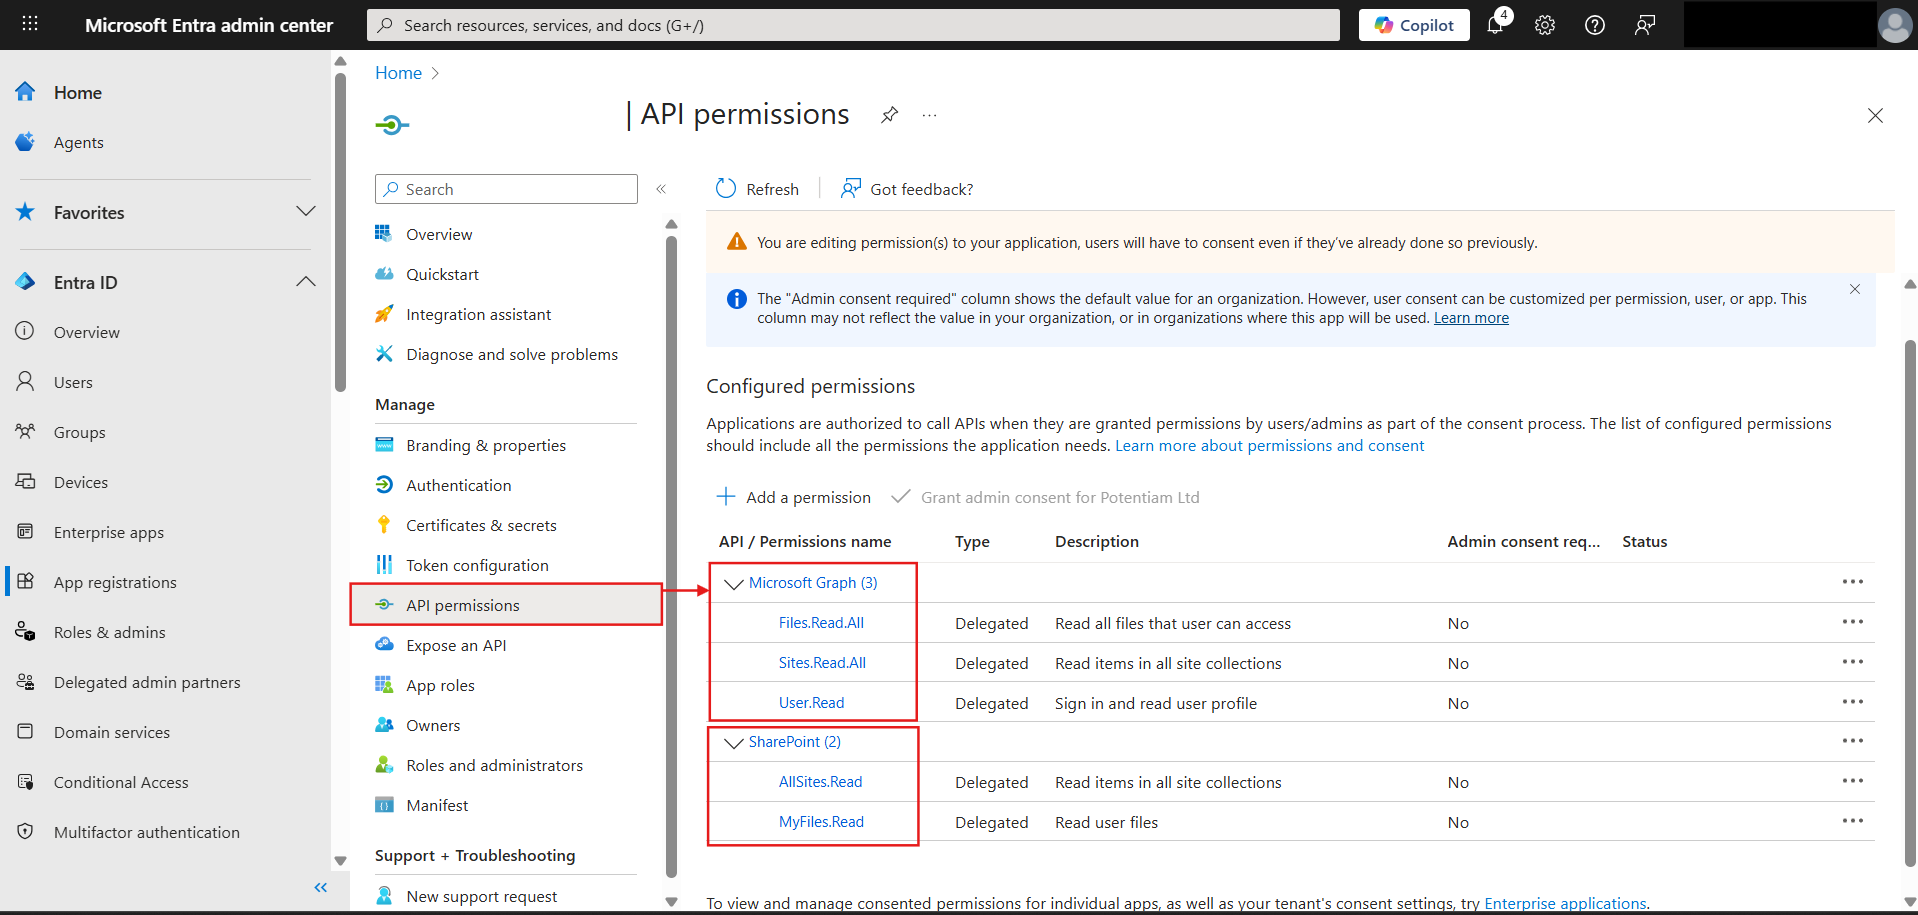
The documentation has been updated along with the necessary code, so if you are cloning the repo anytime from version 0.6.32 it should be fine - follow the instructions on Integrations Tutorial.
Here's some visual help on which all values you are supposed to consider as you try to populate your env configs in the code from the Entra app:
Will add more features as I implement them and if they are useful enough to be worth documenting